
Step-by-Step Tutorials
Your First Database Connection
Your First Database Connection
Connecting to a database for the first time can feel daunting, but WhoDB makes it straightforward. This tutorial will walk you through every step of establishing your first successful connection, from understanding the login screen to troubleshooting common issues.
What You'll Learn
By the end of this tutorial, you'll be able to:
- Navigate the WhoDB login interface confidently
- Select the appropriate database type for your needs
- Configure connection settings correctly
- Troubleshoot common connection problems
- Verify a successful connection
Info
This tutorial assumes you have WhoDB installed and running. If you haven't installed it yet, check out the Installation Guide.
Prerequisites
Before starting, make sure you have:
- WhoDB installed and accessible in your browser
- Database credentials (username, password, host, port)
- Network access to your database server
- Basic understanding of your database type (PostgreSQL, MySQL, etc.)
Step 1: Understanding the Login Page
When you first open WhoDB, you'll see a clean, focused login page:
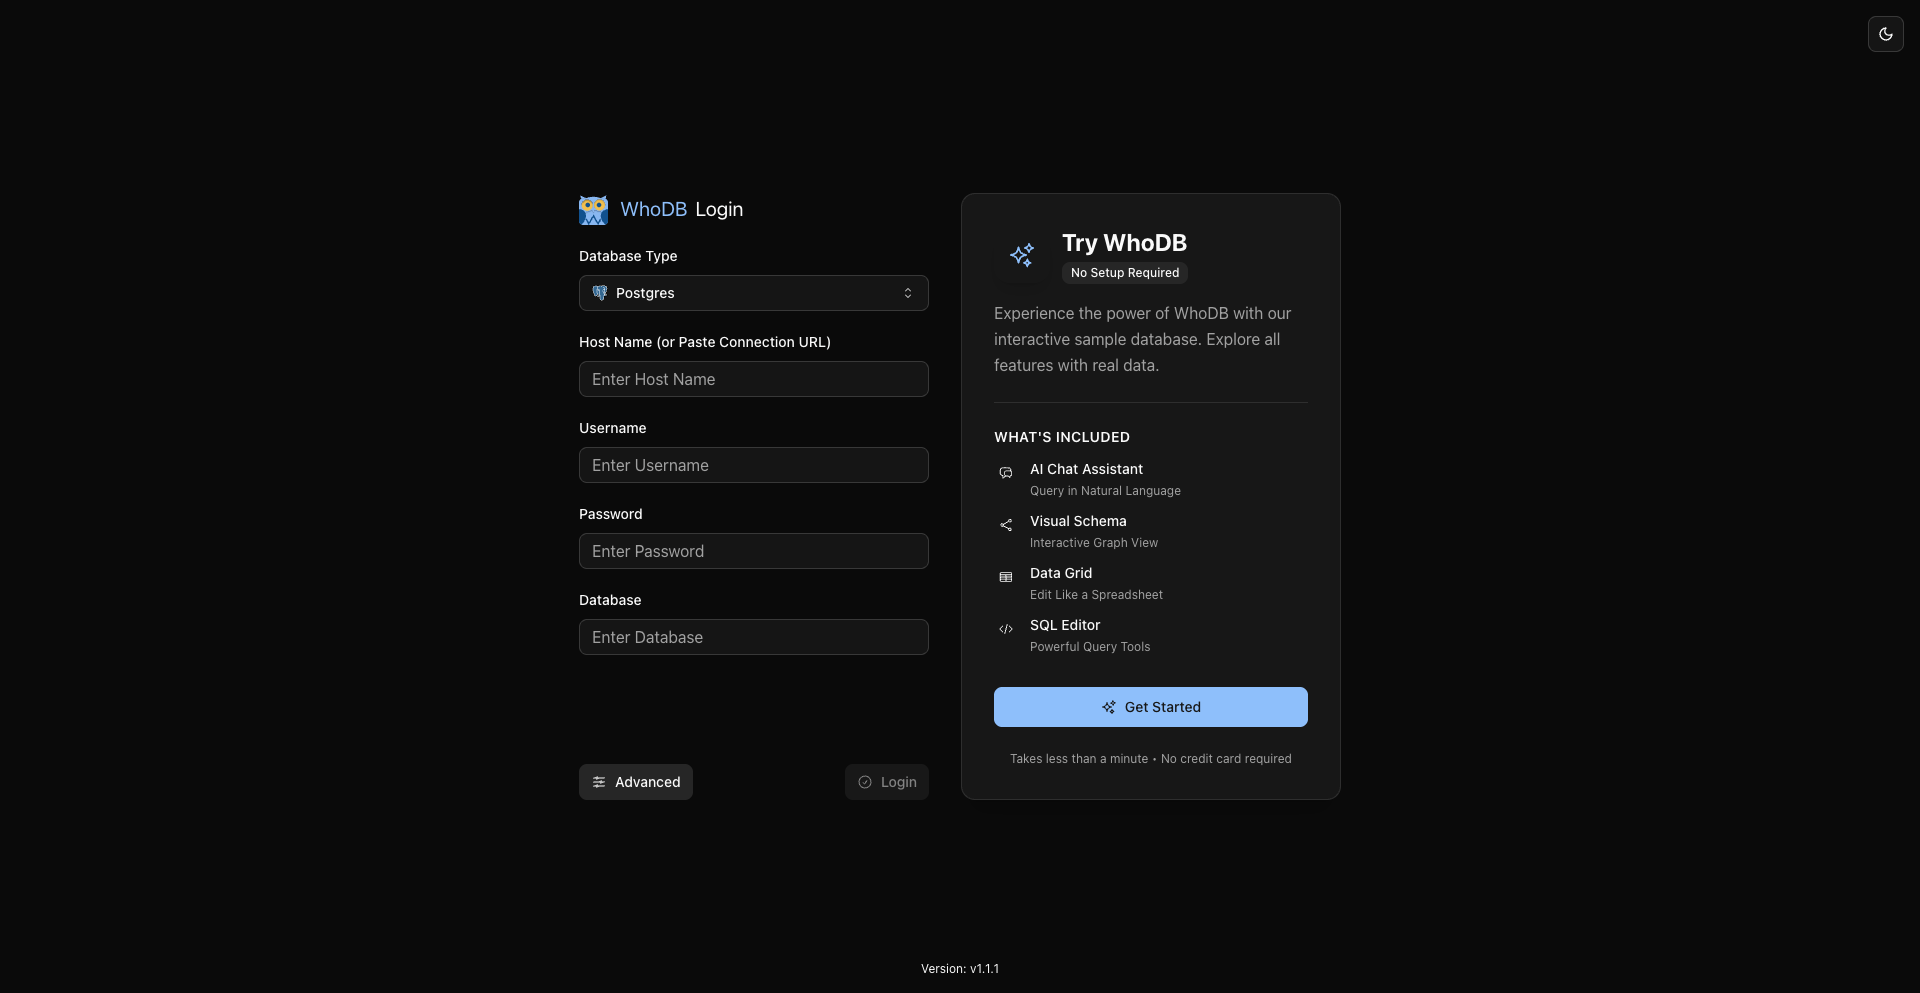
The login page is designed with simplicity in mind. You'll notice several key elements:
Database Type Selector: The dropdown at the top allows you to choose which type of database you're connecting to. This is the first and most important decision.
Connection Fields: Below the database type, you'll see fields for entering connection details. These fields change based on the database type you select.
Advanced Options: An expandable section for SSL/TLS certificates and database-specific connection settings.
Connect Button: Once your details are entered, this button establishes the connection.
Tip
Recent connection profiles can be persisted locally in your browser for faster reconnection. On shared machines, use a dedicated browser profile or clear saved connections when you're finished.
Step 2: Selecting Your Database Type
Click the database type dropdown to see all available options:
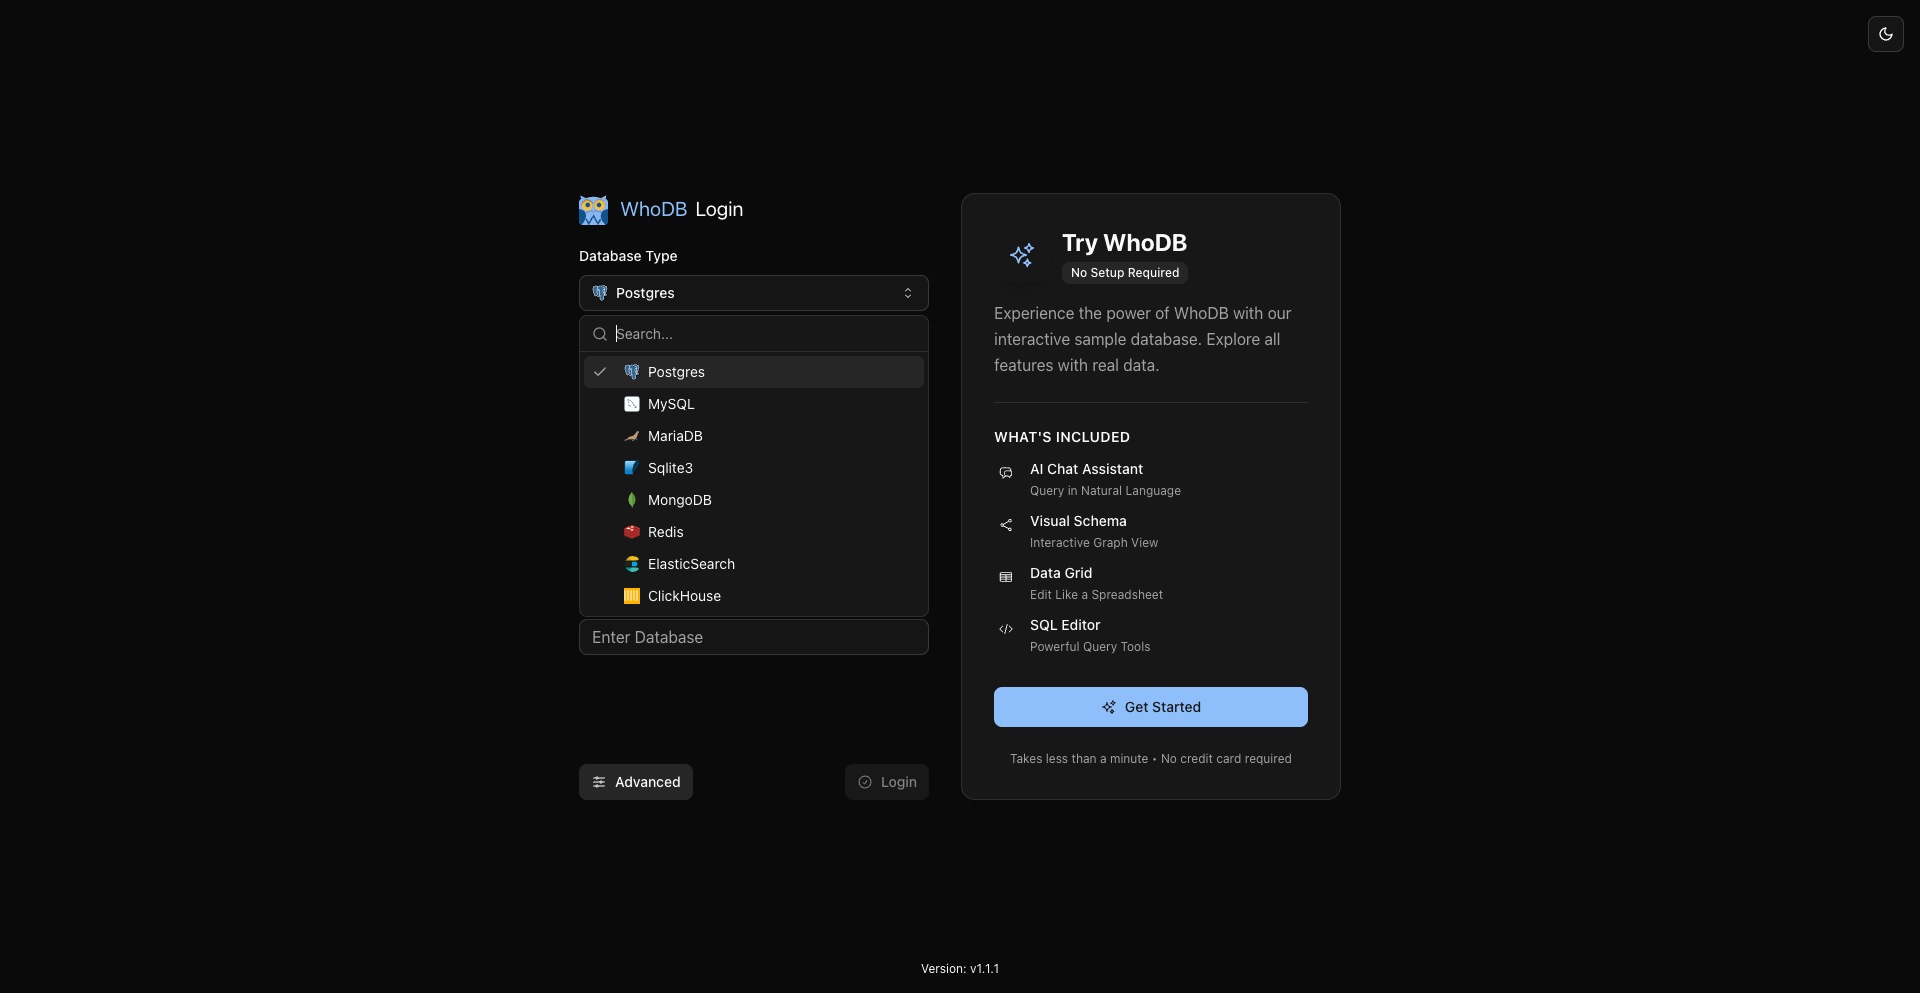
WhoDB supports several database types:
The world's most advanced open source relational database
Popular open source relational database management system
Self-contained, serverless SQL database engine
Document-oriented NoSQL database
In-memory data structure store
ClickHouse, DuckDB, Memcached, OpenSearch, CockroachDB, TiDB, Valkey, Dragonfly, and more are also available in the current catalog
For this tutorial, we'll use PostgreSQL as our example, but the process is similar for other database types.
Note
Choose the database type that matches your actual database. Selecting the wrong type will result in connection errors.
Step 3: Entering Connection Details
After selecting PostgreSQL, the form updates to show the required fields. Let's fill them in:
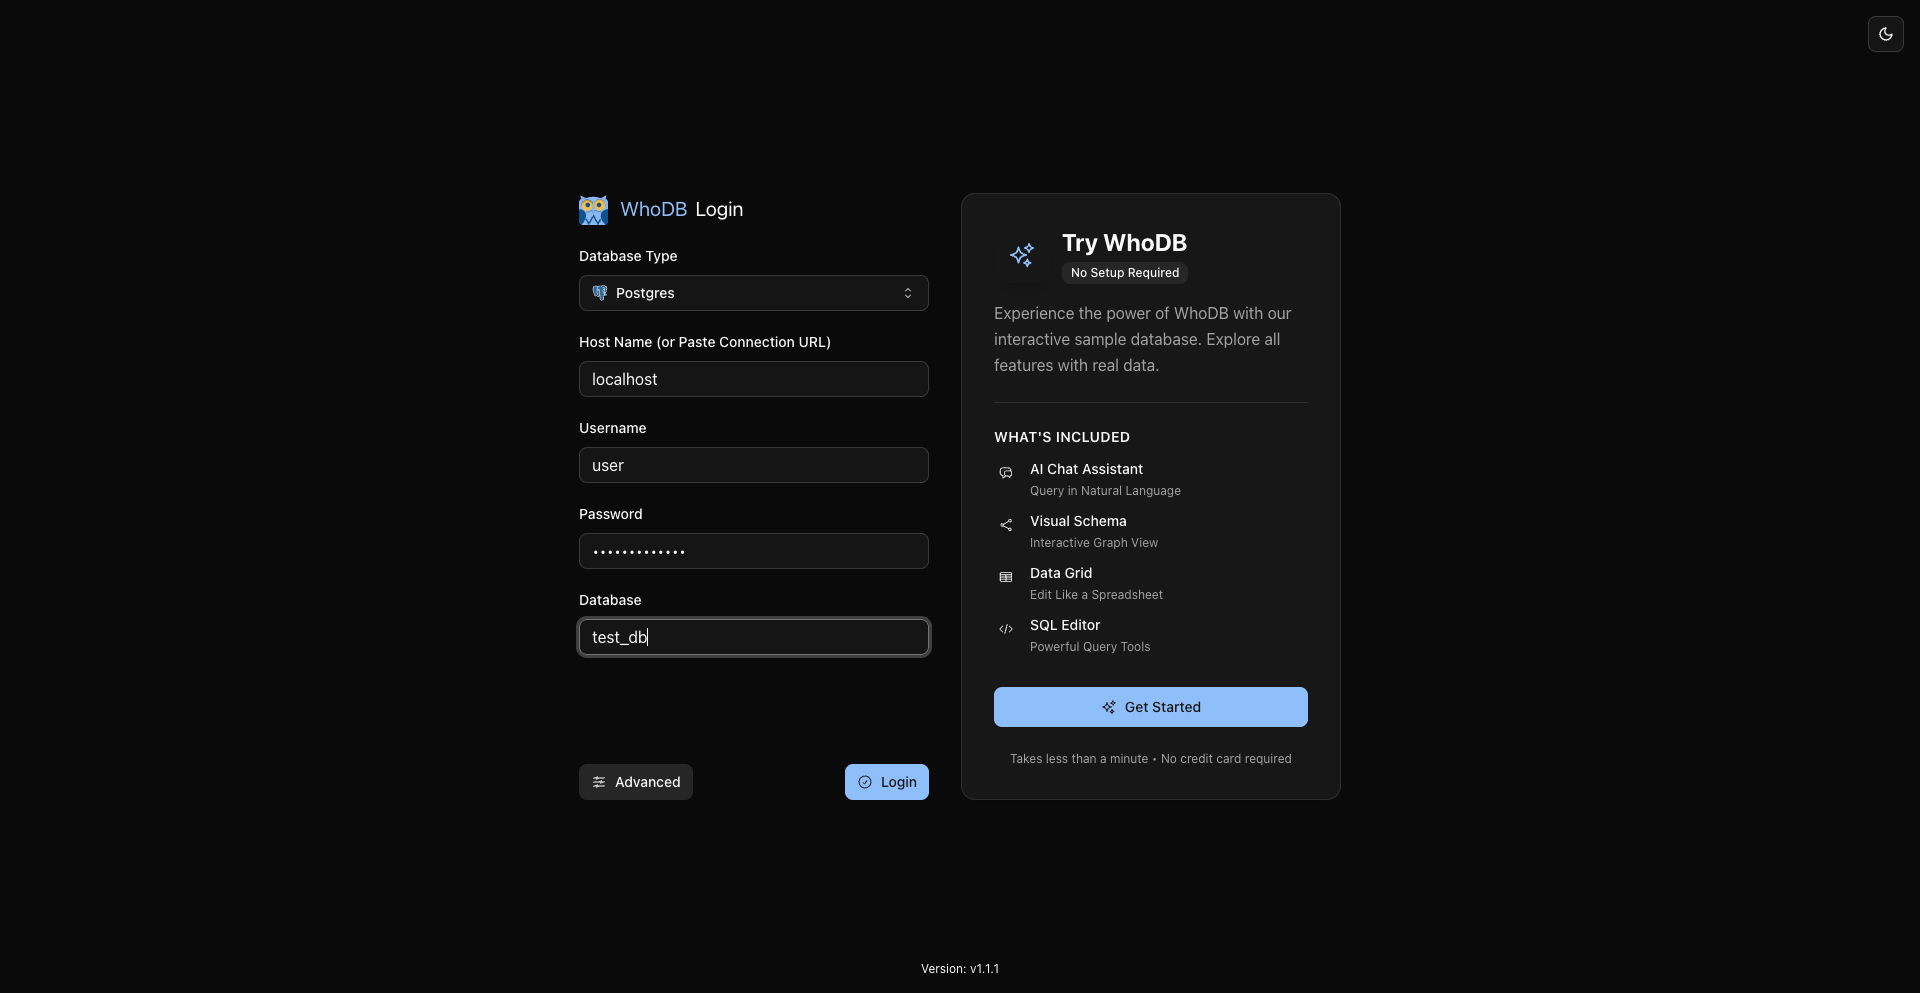
Here's what each field means and what to enter:
Host: The address where your database server is running. Common values:
localhost- For databases on your local machine127.0.0.1- Alternative localhost addresshost.docker.internal- When WhoDB runs in Docker connecting to host machinepostgresor other service names - When using Docker Composedb.example.com- For remote servers- IP addresses like
192.168.1.100- For local network servers
Port: The port your database listens on. Default ports:
- PostgreSQL:
5432 - MySQL:
3306 - MongoDB:
27017 - Redis:
6379 - SQLite: No port needed (file-based)
Username: Your database user account. Common usernames:
- PostgreSQL:
postgres(default superuser) - MySQL:
root(default administrator) - Custom users: Your organization's specific username
Password: The password for the database user. Enter this carefully as passwords are case-sensitive.
Database: The specific database you want to connect to. This is the database name within your server:
- PostgreSQL:
postgres(default database), or your application database likemyapp_production - MySQL: Your database name like
wordpressorecommerce - MongoDB: Your database name or leave blank to see all databases
Warning
Never share your database credentials through insecure channels. Always use strong, unique passwords for production databases.
Example Connection: Local Development
For a local PostgreSQL development database:
text
Host: localhost
Port: 5432
Username: postgres
Password: dev_password
Database: myapp_dev
Example Connection: Docker Compose
When connecting from WhoDB to a PostgreSQL container:
text
Host: postgres
Port: 5432
Username: postgres
Password: password
Database: app_db
Example Connection: Remote Server
For a production PostgreSQL server:
text
Host: db.example.com
Port: 5432
Username: app_readonly
Password: secure_random_password_123
Database: production_db
Step 4: Configuring Advanced Options (Optional)
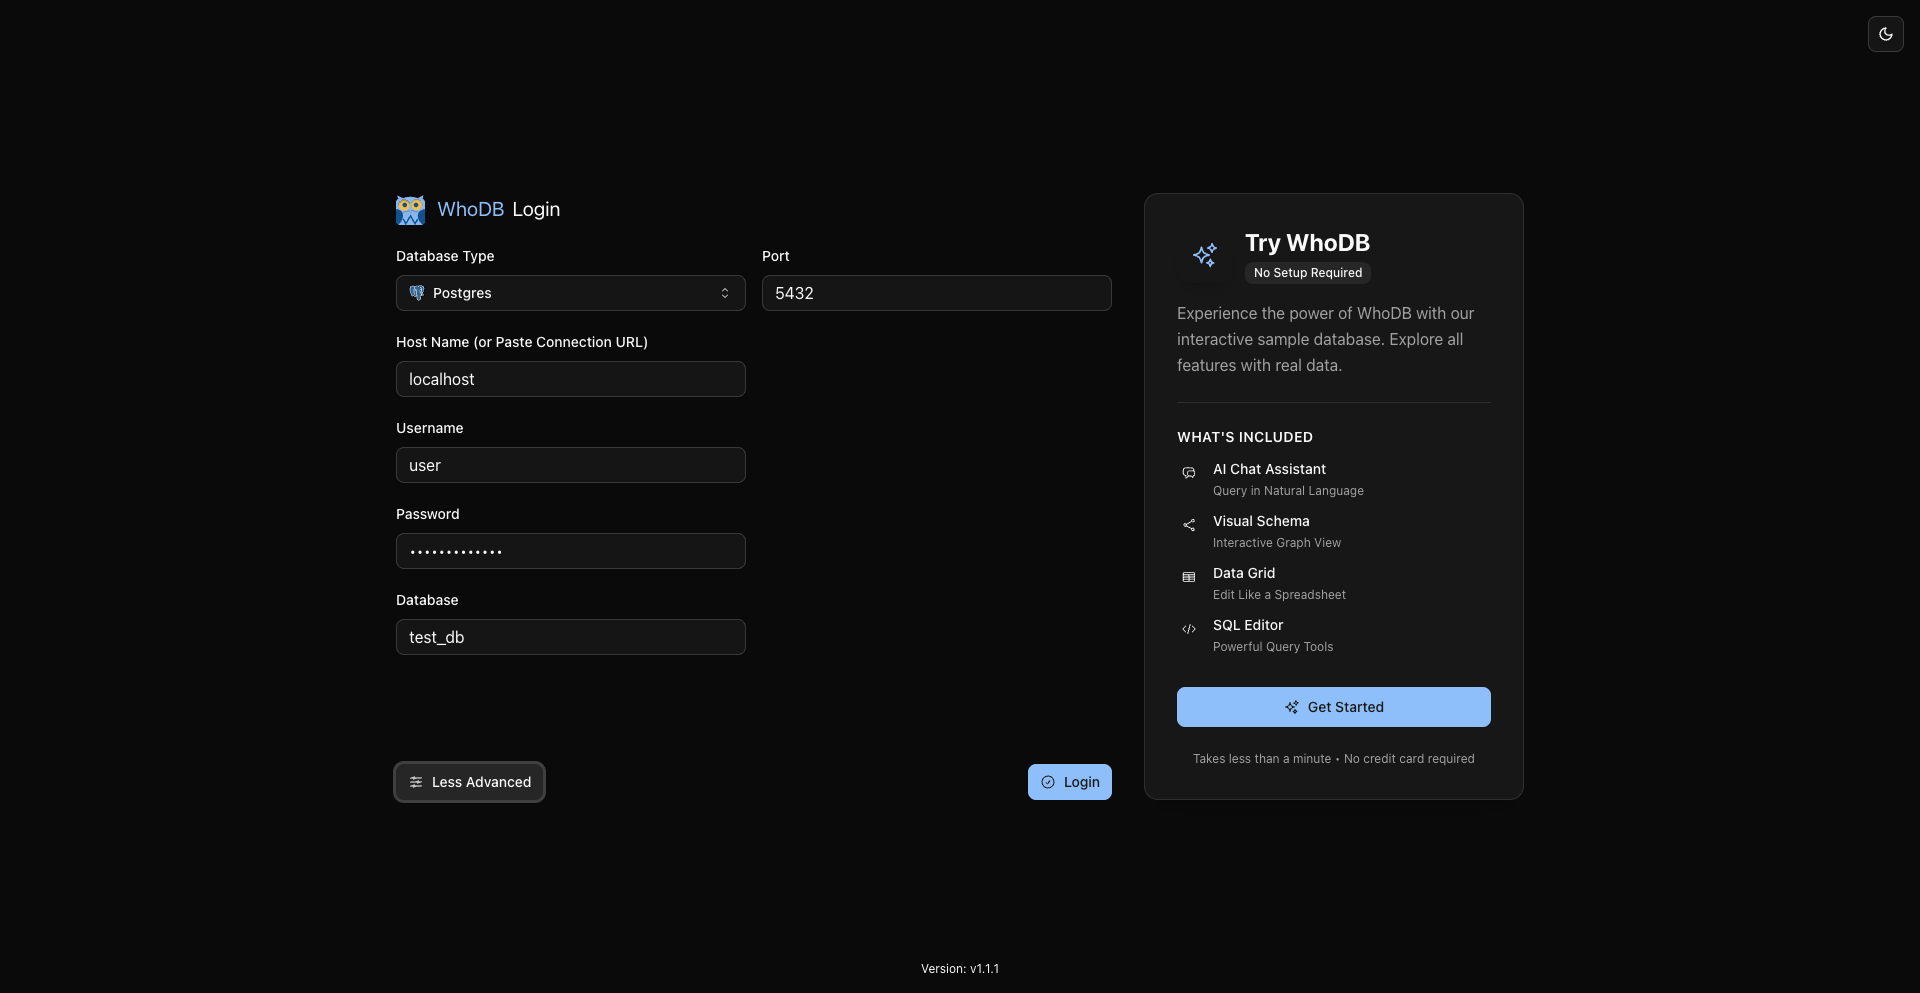
For secure connections or special networking requirements, click the "Advanced Options" section:
Step 5: Establishing the Connection
Once all fields are filled correctly, click the "Connect" button.
WhoDB will attempt to:
- Validate your input fields
- Establish a network connection to the host and port
- Authenticate using your username and password
- Connect to the specified database
- Verify permissions and access
This process usually takes 1-3 seconds. You'll see a loading indicator while the connection is being established.
Check
Success! If the connection succeeds, you'll be redirected to the main WhoDB interface showing your database structure and tables.
Troubleshooting Connection Issues
If your connection fails, don't worry. Here are the most common issues and their solutions:
Verifying Your Connection
Once connected successfully, you should see the main WhoDB interface with:
- Left sidebar: Navigation for Chat, Storage Units, Graph, Scratchpad, and Settings, plus your current database/schema selection
- Main area: Displaying a list of available tables or storage units
Take a moment to explore:
- Expand schemas in the sidebar
- Click on a table to view its data
- Check that the database name appears correctly in the interface
Tip
If you see your tables and can browse the sidebar, your connection is working perfectly. You're ready to start exploring your data!
Security Best Practices
Now that you're connected, keep these security practices in mind:
Next Steps
Congratulations on establishing your first database connection! Now you're ready to:
Summary
In this tutorial, you learned how to:
- Navigate the WhoDB login interface
- Select the appropriate database type
- Enter connection details correctly
- Configure advanced options for SSL/TLS and network reachability
- Troubleshoot common connection issues
- Verify a successful connection
- Follow security best practices
Check
You're now connected and ready to explore! The next tutorial will show you how to navigate your database, view data, and use filtering and search features effectively.